There are several users complaining about an annoying error
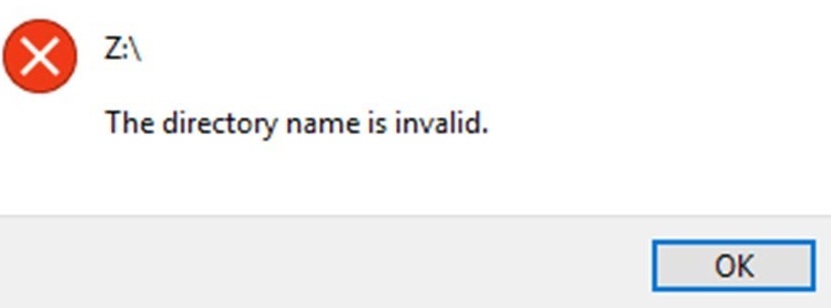
“the directory name is invalid” on Windows. This message generally appears after updating or installing Windows 10.
The problem might be triggered by one of the device drives attached to the dusty SATA port. Apart from this, antivirus software can also influence this error to appear on your system. Further, outdated or corrupted device drivers can also responsible for this issue.
When this error appears on the screen, users are not able to access certain directories, folders or files. Under such circumstances, they became anxious and look for some reliable hacks to resolve this matter.
Here, in this post, we are going to mention all the necessary information along with the effective solutions to fix the directory error.
7 Effective Methods To Try When Directory Name Is Invalid
Error notification on “The directory name is invalid Windows 10” is quite annoying. It can create plenty of issues with other applications as well. So, if you ever encounter this error message, then stick through the undermentioned section and apply the most effective methods to troubleshoot this error with convenience.
Procedure 1: Disable the Firewall or Antivirus
Primarily, you must start with the steps before the actual procedure. It will help you to avoid further issues while rectifying this directory error.
Every device has a security application that protects the device from malware or web threats. Antivirus software secures the files, data, and documents present on the device. But sometimes, due to certain reasons, they tend to conflict with the basic function of the device.
Furthermore, it can also interfere with other applications that are installed on the device. Therefore, we suggest you disable both of the firewall and antivirus software before applying the advanced fixes.
To try this method, go through the underlying steps.
Steps to Disable Firewall:
- Press the combination of the Windows logo + R key. Then, launch the Run window. Write “Control” into the Run dialog box and hit the Enter key to execute the command.
- Now, you will find the Control Panel at the top of the search result. Tap on the top search result to launch the window.
- From this window, find the Windows Firewall. Once you locate the program, right-click on it to open the experience.
- Under the Windows Firewall window, choose the “Turn Windows On or Off” option located on the left side of the menu.
- Now, hit the Radios key, which sits right beside the option to Turn Off Windows Firewall.
- Finally, proceed to tap the Apply button as well as the OK button to save the recent modifications.
Steps to Turn off Antivirus:
- Open the Start menu by tapping on the Start icon. After that, navigate to the Settings.
- Once the Settings window opens, click on the “Update and Security” option from the appeared menu.
- Next, locate the Windows Security. You may find it in the upper-left side of the window.
- Thereafter, tap on the “Virus and Threat Protection” and proceed to invoke the Settings window.
- Once the Virus and Threat Protection Settings window invokes, hit the “Disable Windows Defender’s real-time scanning” option to turn off the antivirus.
After performing these instructions, reboot your device to let the new changes take effect. Hopefully, the error gets removed. But, if you still find “directory name is invalid Windows 10” error notification, proceed to the next successive procedure.
Procedure 2: Try to Use a Different SATA Port
There is a chance that you encounter “the directory name is invalid” error message due to certain issues with the SATA port connected with the DVD. So, it is recommended that you check whether the SATA port is properly working or not. If you find that something went wrong with it, attempt to use a different SATA port.
Procedure 3: Check Disk Errors
After performing the above instructions, if you still find the same error, you can use the Disk Check utility. It is a built-in tool that is provided with Windows-based devices. To proceed with this process, follow the underlying steps.
Step 1: Press the Windows logo key along with the E key. This process will invoke the File Explorer window. Under this window, navigate to “This PC” and right-click on the “Local Disk” to invoke the queue menu.
Step 2: From the queue menu, hit the Properties button. Once the Properties window invokes, move the cursor to the Tools section and locate the Scan Drive option. Afterward, follow the on-screen guidelines to complete the further process.
This process might take some time to finish. So, be patient and don’t interrupt the process in between.
Procedure 4: Remove the Portable Devices
In this procedure, we suggest you remove all the portable devices. Also, check whether “the directory name is invalid” message gets removed or not.
- First, press the combination of the Windows logo + X key to invoke the menu list. From the menu list, select Device Manager.
- Once the Device Manager window opens, navigate to the View option and choose the “Show Hidden Device” option from the appeared menu.
- Afterward, go to the Portable devices and tap on it to expand the section. Now, tap on the portable devices respectively and hit the “Uninstall” option to remove them.
Procedure 5: Uninstall and Reinstall the DVD Drive
Furthermore, this is another way to resolve the directory error. Follow these dedicated steps to do this task.
Open the Device Manager window and choose the DVD Driver from the DVD/CD-ROM drives tab present at the left side panel.
Now, right-click on the DVD Driver and choose the “Uninstall/Remove” from the resultant menu.
Once the process is over, go to the official website of Windows and download it. After downloading, follow the on-screen instruction to install it.
Procedure 6: Update the BIOS
Outdated BIOS can be another significant cause that can trigger the directory error. So, it’s a wise decision to update the BIOS. Therefore, follow the undermentioned dedicated steps to update the BIOS.
Invoke the Run windows by following the above steps. Once the Run window opens, write “msinfo” and hit the Enter key to execute the command.
After executing the command, scroll down the page until you find the BIOS. Once you find the BIOS, tap on it and check the status. If you find that the BIOS has not been upgraded, then you can visit its official website.
Here, you need to find the newest compatible version of your device. After that, download and install it to your device by following the on-screen instructions.
Once the process is completed, reboot your machine to get the desired result.
Procedure 7: Perform System Restore
If none of the above methods works, attempt to perform a system restore. In order to do this, follow the steps below.
- Press the Windows logo and S key simultaneously. Then, type “System Restore” into the Search dialog box and hit the Enter key to launch the application.
- After that, you will see the System Properties window. Move the cursor to the Properties tab and locate the System Restore option from the queue window.
- Now, simply click on it and confirm the process by tapping on the OK button twice. Afterward, proceed to the next window and choose the restore point when everything was fine.
- Lastly, follow the further required instructions to complete the restoration process of Windows 10.
Final Recommendation…
We hope the above procedures are enough for you to eliminate the directory error in no time. Hence, we encourage users to resolve such kind of Windows directory error on their own.
While performing the above-discussed procedures, if you face any sort of difficulties, drop your troubles in the comment section below.